Ice Hockey

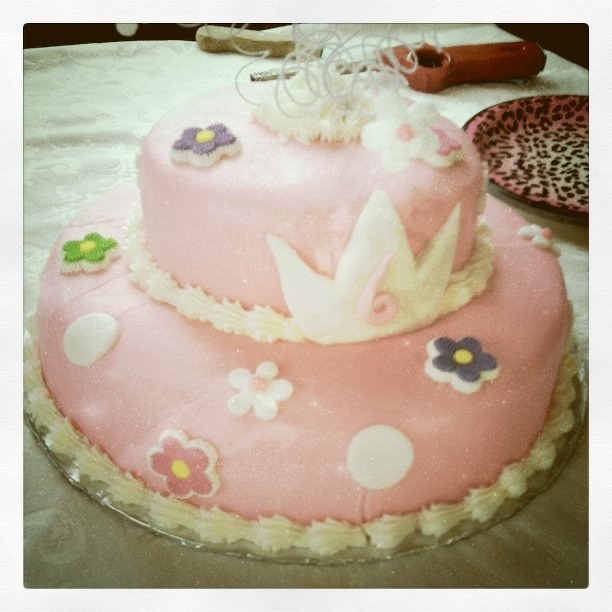
Birthday Party

South Aiken vs. White Knoll

Ellen Lupton AIGA Lecture

McMaster

Honestly didn’t know they still made typewriters

The sky

The back stairs

My classroom, after class

A Zoo Valdes Unwantable hanging out on my shelf

Fancy Nancy

Handprints at my wife’s school

Well worn: Retiring my original 4GB iPhone

This post was originally posted on September 29, 2010 on Sketchbook B. It’s reposted here as part of a project to move some of my favorite writing to my new site.


I purchased my iPhone just over three years ago. In fact, I purchased it the day Steve Jobs announced the $200 price cut and I snapped up a 4GB model from my local AT&T store that afternoon.

This was a big change for me. I had never really paid for a phone before. I got whatever Nokia was free with the plan… And I rarely used texting, camera or data.

When I first got the iPhone, it seemed like everywhere I went, I was demoing the phone. Everyone wanted to zoom in on maps and flip through pictures.

Several days after I got my new iPhone, my youngest daughter was born. And from the hospital, I took pictures and emailed them immediately to friends and family. (In fact, when my wife went into labor, I found myself without a watch and used the stopwatch to time contractions. It remains the only time I’ve ever used the stopwatch.)

Initially, I wasn’t interested in the camera. I had a high quality SLR and point and shoot. But I found time after time, when I needed a camera, the iPhone was with me. And the high end equipment wasn’t. I got lots of great candid shots with the iPhone.

I also stopped carrying my iPod. While I couldn’t store all my music on the 4GB iPhone, I was able to sync the stuff I listened too most. And found myself slowly using my iPod less and less.

Deteriorating

The first sign that my iPhone was starting to show it’s age was that after about two years, the speaker developed a minor issue where it was hard to hear when there was a lot of background noise. It wasn’t a deal breaker, but occasionally, I was frustrated. I contemplated replacing my iPhone with a shiny new 3G or 3Gs. But I didn’t.

A few months ago, I dropped the iPhone. I had dropped it previously without serious damage, but this time it hit just right… and the face cracked. It still worked. But now, a new phone was going to have to happen soon. At the time, the iPhone 4 was just out and with the reception issues, I decided to wait a little bit. After all, it still functioned fine. Plus the idea of replacing my reliable old iPhone made me a little sad.

A few weeks later, I dropped it again. This time, the screen didn’t crack. But the side bowed out a little bit. The side with the volume was bent so that the volume down button was constantly depressed. So the phone would turn the volume down at random times. My iPhone was no longer functional as a phone. It was time to replace my iPhone.

My new phone

I stopped into an AT&T store and upgraded. A shiny new iPhone 4. Shockingly they had some in stock and the transfer was painless.

The phone is faster. The screen is better. The camera is better. I don’t have to deal with slow data speeds. My reception is better and I haven’t had any of the antenna issues that are so well documented. In every way, the new iPhone is a better device. But, just a little bit, I miss my original iPhone.

How we relate to tech

I’ve had a lot of computers. And iPods. And other gadgets. But the iPhone is the first piece of technology that I’ve had with me constantly. I can take my laptop or my iPad with me, but I don’t always have it. I carried my iPod frequently, but if I forgot it, no big deal. However, my iPhone was indispensable. For 3 years, I carried and used it every day.

As gadgets become more portable, they become more a part of our lives. iPhones - and other smartphones - are becoming an integral part of how we experience, document and remember the world around us. My iPhone was with me for a whole range of monumental events over the last three years - my last year as president of AIGA South Carolina, numerous trips and vacations and the birth of my child. And often it was used to take pictures, make arrangements, get directions and even time contractions. And for that reason, I’ll always have a special place in my heart for my slow, well-worn first generation iPhone. (Even if I love my new phone…)

Delivering Presentations with the iPad

This post was originally posted on April 9, 2010 on Sketchbook B. It’s reposted here as part of a project to move some of my favorite writing to my new site.


I teach a college class on Visual Communication twice a week. So that means that twice a week, I pack up my laptop and haul it to class. It’s not that heavy, but since it is our main computer, taking the laptop wasn’t always convenient. So I figured I’d try using my new iPad (with the VGA adapter) and Keynote for the lecture.

Building the presentation

I’m really impressed with Keynote for the iPad. I was able to create a very simple presentation on the iPad in about 30 minutes. It’s intuitive and very easy to use.

Please note: This version of Keynote cannot do everything that the full version of Keynote can do. There are limitations - typeface selection, limited customization of templates, difficulty importing existing presentations. And the way you sync documents is exceptionally clumsy.

If you are wanting to build an amazingly complex presentation, you’ll need to do it on the Mac. If you need to access an existing library of Keynote or Powerpoint presentations, I’d stick to using the laptop. But for building (or importing) a simple presentation, it’s nice. And considering that it’s $10, I’d say it’s well worth the price.

Hooking up to the projector

The VGA adapter looks pretty simple. Plug it into the dock connector, connect the VGA cable and you are good to go… And for the most part, it is that simple. Be aware that when working from Keynote, video projection doesn’t start until you hit the play button.

When the iPad is in presenting mode, your slides show through the projector and the iPad has a simple forward/back control. And you can simply tap to advance. If you push and hold on the iPad touch screen, a faux “laser” pointer pops up.

My only complaint is that the slide thumbnails are so small. In my classroom, the screen is behind me and over my head, so I occasionally had to turn around to see what slide was being presented.

A screenshot of the presentation screen for Keynote on the iPad.

Will I do it again?

Absolutely. I use relatively simple presentations for my classes. So Keynote is perfect for how I’m using it. Plus not having to lug my laptop to class is nice. I’m optimistic that Keynote will continue to improve on the iPad… But as a lightweight presentation setup, the iPad is absolutely a winner.

Customizing InDesign's Links Panel

This post was originally posted on February 5, 2010 on Sketchbook B. It’s reposted here as part of a project to move some of my favorite writing to my new site.


NOTE: While this page may have useful insights, be aware that it was published more than 10 years ago and may not be relevant for current software versions.


I’m primarily a print designer. So when it comes to linked files in InDesign, I need to know two main things – what is the color space of the linked file and what is the resolution of the file. InDesign CS4 makes it easy to find this info. If you click the arrow in the lower left hand corner of the Links Panel, you’ll see a link information box that gives you all sorts of data about the selected link including color space, actual PPI and effective PPI. (Actual PPI measures what the resolution of the file in its native form. Effective PPI calculates the output resolution based on how it is scaled within InDesign.)

It’s great and very handy, but you can only see one link at a time. And if you are trying to scan a document quickly to find low-res or RGB files, you still have to click on each link. Thankfully, Adobe offers another option. On the Links Panel, go to the flyout menu and select “Panel Options.”

Select “Panel Options” from the flyout menu…

…and you can fully customize the appearance of your Link Panel.

Here you can customize what information is shown in the Link Info Box AND you can add information to show up in the Link Panel itself. Very handy for scanning a document quickly.

Link Panel showing color space and effective resolution.

Soup, Spoons and Social Media

This post was originally posted on November 12, 2009 on Sketchbook B. It’s reposted here as part of a project to move some of my favorite writing to my new site.


I went to Subway last week. I don’t typically eat at Subway, but there is one by my office and I didn’t have much time for lunch. As I walked in, on the door, there was a window cling encouraging me to order soup with a combo. When I got in line, I looked up and there on the menu was an ad encouraging me to order soup. At the register there was another sign.

So I ordered soup.

I grabbed a seat. And realized I didn’t have a spoon. I looked up by the straws and napkins. There were forks and knives, but no spoons. So I asked the woman behind the counter – the same woman who sold me the soup – if they had any spoons. After asking another employee, she confirmed that they had no spoons in the restaurant.

The big picture

It seems both silly and odd that a franchisee would go to all the trouble of putting up all the signs and ads and then mess up something as simple as having spoons.

But I think this type of thing is very common in business. Often, we see people obsess over seemingly insignificant details, only to completely overlook a major issue. They work on the details and lose sight of the big picture.

As designers, we see this a lot.

Clients spend time and energy critiquing minor elements of a design, but often forget to shore up the logistical issues that support a campaign. Marketing and design are critical, but so is customer service and support. Think about my Subway story for a second. The marketing worked. I entered the store. And I purchased soup. However because of a minor – but critical – oversight, I was a dissatisfied customer.

Social media and a lack of spoons

Right now, social media is all the rage. Everyone seems to be talking about how social media can help their business. Worrying that they’ll be left behind if they aren’t on Twitter or Facebook. Consultants are aggressively selling social media services.

But I fear many of these folks are losing sight of the big picture. Social media is a tactic. And yes, it can be an effective and powerful tactic. But as companies develop their social media plans, they cannot forget that it is just the beginning of the customer relationship. Strategically, you need to think through the entire customer experience. What are you going to do with your customers after you reach out to them through social media? How do you want to engage your customers on a continuing basis?

I’m not saying social media is bad or that it isn’t important. There are absolutely uses for social media in business and marketing. Just remember that the social media tactics are only the beginning. You and your company need to prepare for a long-term customer relationship.

Or in other words, when you decide to sell soup, make sure you are ready to provide spoons.


Bob Wertz is a creative director, type designer, Ph.D. student and researcher living in Columbia, South Carolina. He’s been blogging since 2008.

How GREP can save you time in InDesign

This post was originally posted on October 6, 2009 on Sketchbook B. It’s reposted here as part of a project to move some of my favorite writing to my new site.


NOTE: While this page may have useful insights, be aware that it was published more than 10 years ago and may not be relevant for current software versions. Sadly, links to other resources might be broken.


I received a file containing 100 pages of information in a table. The table needed to be placed into InDesign. No problem…

Well, of course there was one problem. Randomly, the lines began with spaces. Not every line, but most lines. So the left edge of the table looked ragged. So how do you take out random spaces at the beginning of text? In a table? Without doing it manually? (Because I have much better things to do than going through a 100+ page document line-by-line…)

What is GREP?

In InDesign CS3 and CS4, you can choose to do GREP find and change. GREP is a text search function originally written for UNIX. Basically, it lets you look for patterns and allows you to do find and replace based on those patterns.

So back to the random spaces…

What I had was a pattern. Find all spaces at the beginning of the paragraph and replace with nothing. GREP was the perfect solution.

Next to the find and change fields are flyout menus (marked with “@”) that give you shortcuts to all of the variables. For example, go to “Locations>Beginning of a Paragraph” and InDesign inserts a “^” into the field.

So I typed “^ ” (there is a space after the ^) in the “Find what” field – which tells InDesign to find one space at the beginning of any paragraph. I left the “Change to” field blank, clicked “Change All” and several thousand instances were changed instantly. Without having to go through line-by-line…

EDIT: Above, I set up the search with the ^ (to find the beginning of the paragraph) and a space after it. And while it works, a reader pointed out correctly that a better search would have been “^\s+” which would have found one or more spaces at the beginning of a line.

What else can GREP do?

I’ve used GREP to replace dashes or periods at the beginning of lines. And GREP is perfect for standardizing the formatting of a phone number across an entire document. GREP is amazingly powerful and you can build a GREP search for anything with a pattern. I’ve only scratched the surface…

You can save queries to be reused. (Several sample searches – including a phone number formatting query – are already saved as a sample searches in InDesign. It’s located at the top of the dialog box.)

InDesign also lets you apply GREP-based character styles – for example, telling it to find all prices in a document and apply a particular style.

It’s probably not for everyone.

You aren’t going to need GREP find/change unless you are doing some pretty heavy duty, long document work like magazines, catalogs and directories.

I’m pretty sure most InDesign users aren’t doing that kind of work. But if that type of project comes across your desk, keep in mind that GREP might be a great – and time-saving – solution for your project.

More resources

Want to learn more about what GREP can do for you? If you do a search for GREP, there are lots of resources out there. Two that I have found helpful:

More powerful text placement in InDesign

This post was originally posted on July 29, 2009 on Sketchbook B. It’s reposted here as part of a project to move some of my favorite writing to my new site.


NOTE: While this page may have useful insights, be aware that it was published more than 10 years ago and may not be relevant for current software versions.


So let’s say you have a long text to place into InDesign – a magazine article or a training manual. In talking to some friends who are InDesign users, many of them place the text one frame at a time. But it can be so much easier than that…

Enlargements of InDesign’s text placement cursors. The cursors (and functions) change depending on what additional modifier keys are pressed. From left to right: Manual (default), Semi-Autoflow (Option/Alt), Autoflow (Shift) and Fixed-Page Autoflow (Shift + Option/Alt).

Default behavior…

When your cursor is loaded with text in InDesign, you can place the copy by clicking or by drawing a text box. You load your cursor by going to File>Place or by clicking on a text frame’s overset indicator (the red plus in the lower right “out port”).

If you click on the page, a text frame is created to fill either the page margins or a single column. (You set the margins and column settings when you open a new document.) If you draw a text frame, the text fills the new frame.

One more thing to note about the default behavior. When you are done placing the text, the tool reverts back to what it was before you went to File>Place. So if the Rectangle Tool was selected when you loaded your cursor, after you place the text, the tool becomes a rectangle again. Most of the time, that’s exactly the behavior you want.

Hold down the option key…

(Or the Alt key for you Windows users) If you are placing a long piece of text, you may want to draw a few text boxes and have the story flow between them. In this case, the default behavior of reverting back to original tool is irritating because it forces you to keep switching tools.

However, if you hold down the option key, the cursor stays loaded. You can continue to click or draw frames and the copy with automatically flow between them.

Or the shift key…

So let’s say you have a long training document that’s going to be several pages. When you place the copy, you keep having to add pages and link the text frames. If only InDesign would add the pages and frames for you…

Well, it can. Hold down the shift key when your text is loaded and click. InDesign will autoflow the copy, adding pages and text frames for the entire length of the copy.

Note: If you hold down the shift key and try to draw a text box, the default behavior kicks in and the tool reverts to what it was before you placed the text.

Use the shift key and the option/alt key together…

If you hold down the shift and option keys at the same time and click, InDesign autoflows the copy for that spread only, but it leaves the cursor loaded. If you draw a new text frame instead of just clicking, the copy doesn’t autoflow, but the cursor does stay loaded.

TypeCon 2009 Thursday and Friday Highlights

This post was originally posted on July 18, 2009 on Sketchbook B. It’s reposted here as part of a project to move some of my favorite writing to my new site.


So I’ve been at TypeCon 2009 in Atlanta for the last day and a half. Here are some of the highlights from preliminary workshops and the first full day of sessions.

Historical Calligraphy – This workshop focused on the calligraphic roots of modern letter forms. To demonstrate the process, the instructor, Joey Hannaford – covered the walls with paper and we experimented with letterforms on a large scale with foam brushes and tempera paint. A really engaging way to teach the relationship between historical and modern forms.

A great way to teach the calligraphic roots of modern lettering. On a large scale…

Hatch Show Print – I’ve seen Jim Sherraden’s lecture twice before when he visited AIGA South Carolina. He has expanded his normal presentation and it’s more inspirational than ever. He’s a great guy and the presentation is amazing.

Gail Anderson from SpotCo – Gail gave a delightful talk about her love of type and her history. She also gave a preview of her upcoming book with Stephen Heller, New Ornamental Type, and showed some fascinating typographic videos done by her students. Great presentation.

The “Playroom” – Local Atlanta printer Jessica Germaine brought in her gear to allow TypeCon attendees to experiment with letterpress printing. We were able to use three small presses and a selection of metal and wood type.

Printing my notecards on a small letterpress.

Jessica walked us through all the details and helped with the process. I was able to select and set my type and made some Sketchbook B notecards. I’d never had an opportunity to work with letterpress and the whole experience was amazing.

My completed notecards.

Coming Up – I’m looking forward to the next two days of sessions. Lots of stuff on the schedule, including… Armin Vit from Under Consideration will be talking about the TypeCon identity for this year. REM’s Creative Director Chris Bilheimer (and a former AIGA South Carolina speaker) was added to the agenda. Also on the schedule is a two hour panel discussion on web typography with a various foundries and designers. I’ll post more highlights as the weekend progresses.

Practicing my ABC’s. Experimenting with calligraphic letterforms on a large scale in a pre-TypeCon Workshop.

3728646828 8aeda654af b.

Originally published on Flickr.